
Installing roof tiles is one of the most important tasks when it comes to protecting your home from the unpredictable UK weather. A properly tiled roof not only keeps rain and wind at bay but also adds to the overall appearance and value of your property.
This guide walks you through the essential steps on how to install roof tiles correctly, highlighting preparation, installation, and maintenance tips to ensure a durable and weatherproof finish.
Preparing for Roof Tile Installation
Before you start laying tiles, preparation is everything. Installing a roof is not just about placing tiles in rows; it’s about creating a layered system that resists water and withstands external pressures.
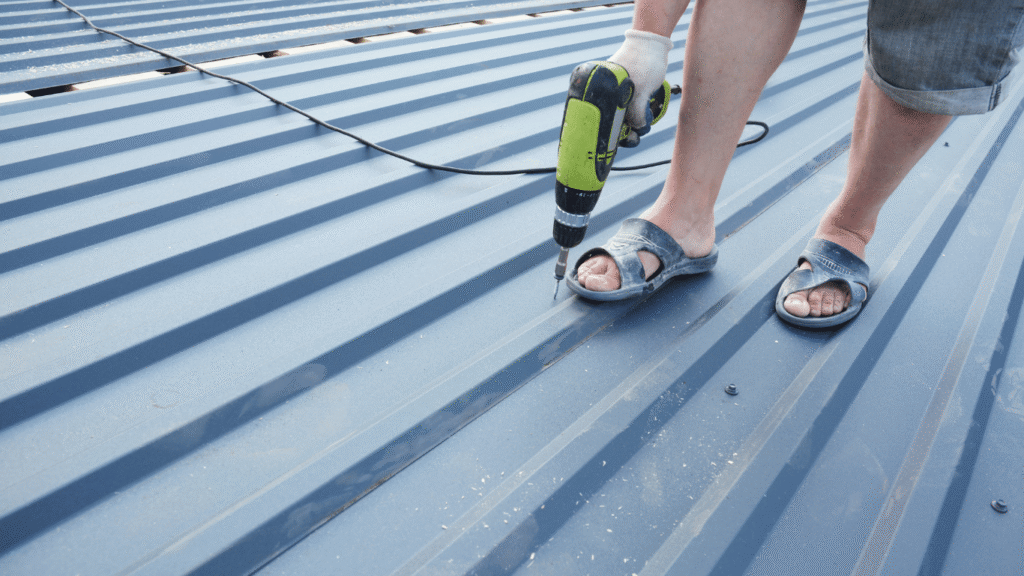
Safety First
Roof work is risky. Always take safety precautions:
- Use a stable ladder secured at the base.
- Wear a safety harness if working on steep slopes.
- Protect yourself with gloves, non-slip footwear, and a helmet.
Tools and Materials You’ll Need
Having everything ready saves time and prevents mistakes:
- Roof tiles (clay, concrete, or slate depending on your choice)
- Underlayment or roofing felt
- Battens (timber strips for tile support)
- Nails or screws
- Hammer, tape measure, chalk line, and a cutting tool for tiles
A little preparation ensures the installation runs smoothly and reduces the risk of costly errors later.
Assessing and Preparing the Roof Structure
A roof is only as strong as its base. Before laying any tiles, inspect the roof deck carefully.
- Check for damage – Look for signs of rot, sagging, or water damage. Replace weak sections of timber to avoid future issues.
- Install underlayment – Lay roofing felt across the deck to create a waterproof barrier beneath the tiles. This step is critical for stopping moisture from seeping through.
- Ensure ventilation – Adequate airflow beneath tiles prevents condensation, mould, and wood rot. Roof vents or breathable membranes can be used depending on the design.
Preparing the structure properly is one of the most overlooked but vital parts of learning how to install roof tiles effectively.
Installing Battens: The Tile Support System
Battens form the skeleton of your roof tile system, holding the tiles in place and allowing water to drain properly.
- Mark spacing with a chalk line based on the tile manufacturer’s recommendations.
- Fix battens horizontally across rafters, making sure they’re straight and level.
- Check spacing carefully as incorrect measurements can throw off the entire roof layout.
Good batten installation is essential for both appearance and strength. Uneven battens lead to crooked rows and gaps that allow water to penetrate.
Laying the First Course of Roof Tiles
The first row of tiles, called the eaves course, sets the foundation for the entire roof.
- Start at the bottom edge of the roof so water flows naturally downward.
- Leave a small overhang into the gutter to guide rainwater away.
- Secure tiles with nails or clips to prevent shifting in strong winds.
- Double-check alignment since every row above will follow this starting line.
How To Install Roof Tiles
If this first course is laid unevenly, the rest of the roof will look crooked and may leak. Taking extra care here saves major headaches later.

Installing Subsequent Rows
Once the first course is set, continue upwards in overlapping layers.
- Overlap correctly – Each tile should cover part of the tile below, ensuring no gaps for water entry.
- Use chalk lines – Keep rows straight and evenly spaced.
- Cut tiles where necessary – At roof edges, valleys, or around chimneys, tiles will need trimming with a tile cutter.
- Stagger joints – Avoid aligning vertical joints between rows to improve strength and stability.
This method ensures that even in heavy rain, water runs down the surface instead of seeping underneath.
Fixing Ridge and Hip Tiles
Ridge and hip tiles are the finishing touches that seal the top and angled edges of the roof.
- Install ridge boards or a ridge roll to support the tiles.
- Lay ridge tiles with mortar or use a modern dry ridge system for easier maintenance.
- Secure hip tiles where two roof slopes meet, ensuring tight coverage against wind-driven rain.
These components not only protect vulnerable joints but also give the roof its polished look.
Flashing and Waterproofing Details
Even the smallest gap can cause leaks if flashing is neglected. Flashing is the material (usually lead or metal) installed around roof features where tiles can’t form a watertight seal.
- Around chimneys and skylights, flashing diverts water away from joints.
- In valleys, where two roof slopes meet, valley tiles or liners provide drainage channels.
- Vent pipes and roof windows should always be sealed with purpose-made flashing kits.
Waterproofing details make the difference between a roof that lasts decades and one that develops leaks after the first storm.
Common Mistakes to Avoid
Many roof failures are the result of avoidable errors. If you want to know how to install roof tiles properly, it helps to know what not to do.
- Ignoring roof slope requirements for certain tile types.
- Using mismatched or low-quality tiles that crack easily.
- Skipping underlayment or forgetting ventilation.
- Laying rows without correct overlap.
- Failing to check alignment regularly.
Even one small mistake can affect the performance of the whole roof, which is why professional installers are often the safer choice for larger projects.

Maintenance Tips for Tiled Roofs
Installing tiles is only the first step. Regular care extends the life of your roof and prevents expensive repairs.
- Inspect after storms – Check for broken or displaced tiles.
- Clear moss and debris – Prevents water from pooling and causing cracks.
- Check gutters regularly – Blocked gutters can lead to water backing up under roof tiles.
- Replace damaged tiles quickly – A single broken tile can lead to leaks and structural issues.
For London homeowners, gutter maintenance is especially important. At City Guttering London, we see countless cases where clogged gutters cause roof damage that could have been prevented with routine cleaning.
Final Thoughts
Learning how to install roof tiles gives you insight into the importance of preparation, precision, and maintenance. From the first batten to the last ridge tile, every step matters for ensuring a roof that can handle heavy rain, strong winds, and seasonal changes.
While handy homeowners may attempt small repairs or minor installations, larger roofing projects are best handled by professionals. Expert installers bring not only experience but also the right tools and safety measures to get the job done correctly.
If you’re in London, Surrey, or surrounding areas, and need help with roof or gutter care, City Guttering London is here to assist. With emergency callouts, scheduled maintenance, and over 200 five-star reviews, we provide trusted services to keep your roof and guttering in excellent condition.